Browsing in Secret: How to Keep Your Router from Tracking You
I travel a lot every work week. The airport, hotel, restaurant, and coffee shop are the main places where I stay during the period. So I always connect to public WiFi to stay online surfing websites, chatting with my friends, and getting jobs done. I am wondering how to hide my browsing history from public WiFi router because I care more about privacy. With that desire in mind, I have borrowed some cybersecurity training courses from my colleagues, spent at least 2 hours each day on them during travel, and read some blogs they published on their websites. Following is what I have learned and collected.
The effective ways to hide your browsing history from your WiFi router are: to use a VPN, enable using HTTPS everywhere feature in the browser, and Use the Tor network. Though there are some other things you are supposed to do for that, such as using Incognito mode or Private Browsing, changing DNS settings, etc. But they don’t give you the results that you want.
It is important to remember that while the use of WiFi routers can be convenient, they can also be used to track your activities. By taking the necessary steps to protect your privacy, you can ensure that your browsing history remains private. Make sure to take the necessary steps to protect your privacy and ensure your browsing history remains unknown to anyone accept yourself. Fortunately, after you have read this article you will know exactly the details of several steps you can take to protect your privacy
A Step-by-Step Guide to Using a VPN to Conceal Your Browsing History from Your Wi-Fi Router
If you are a VPN veteran, you can skip this section and just start to run your VPN application to protect your privacy. In case you have never been using a VPN, read on to take the first step to prevent others to snoop on you.
In today’s digital age, privacy is more important than ever. One way to protect your online privacy is by using a VPN (Virtual Private Network) to hide your browsing history from your Wi-Fi router. A VPN encrypts your internet traffic and routes it through a remote server, making it much more difficult for outside parties to track your online activity. Here, I will provide step-by-step instructions for how to using a VPN to hide your browsing history from your Wi-Fi router.
Step 1: Choose a VPN provider
The first step in using a VPN to hide your browsing history is to choose a VPN provider. There are many VPN providers to choose from, so it’s important to do your research and choose a reputable provider that offers the features you need, the most important feature you should identify is no-logs policy and it should be verified by third-party audits. Some popular VPN providers include NordVPN, ExpressVPN, and Surfshark.
Do not use the free VPN!!! That’ll harm your privacy.
For your convenient, I provide the links to their official website beneath.

Step 2: Download and install the VPN software
Once you have chosen a VPN provider, you will need to download and install the VPN software on your device. Most VPN providers offer software for a variety of devices, including Windows, Mac, iOS, and Android. Follow the instructions provided by the VPN provider to install the software on your device.
Here I’m going to give you an example of how to do it with ExpressVPN, the very famous and common VPN service in the market. The other VPNs follow similar processes.
On ExpressVPN official website, locate Download VPN menu at about top center. Click on it, then you can see the menu of all ExpressVPN applications for various platform. Choose the one that fit your need and begin to download it. For example, I’m going to download ExpressVPN for Windows, so I click on Windows PC VPN on the menu.

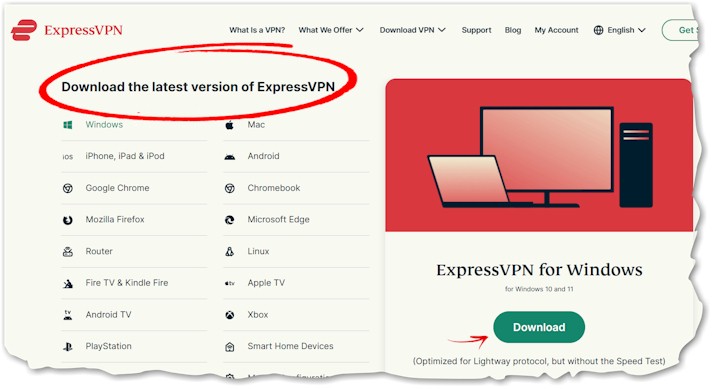
Then go forward according to the instructions on the next web page. Finally, you will be on the page to Download the latest version of ExpressVPN. On the right partition of the page make sure that is the ExpressVPN version you want. In this case, it should be ExpressVPN for Windows.
Then click on the Download button to download the application.
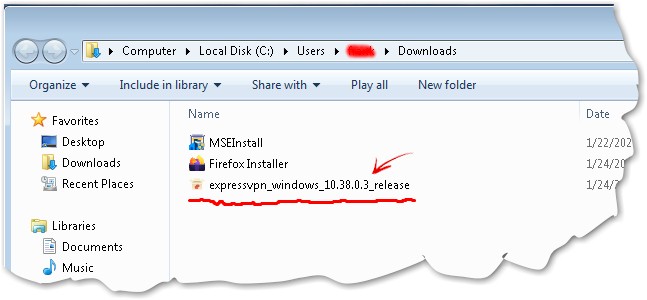
When the ExpressVPN for Windows is downloaded successfully, it would be saved in the default place on your Windows device. That’s the download folder under your account.
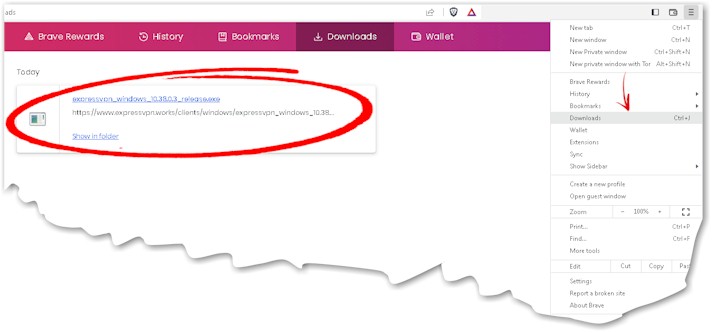
Or you can find it by clicking the menu symbol of your browser(it will be three dots or lines), then click on the download item on the menu that pops up on the right side of the screen. That will bring you to the page that displays the all downloaded files you have ever done. You should find it there, click the related link will bring you to the actual place where the downloaded file is saved.
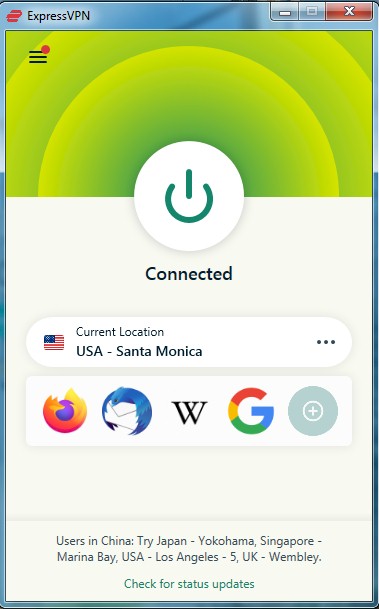
While you have located the downloaded ExpressVPN for Windows installation file, just double click it then the installation will start. After a few seconds, ExpressVPN will be installed. After ExpressVPN is installed successfully, it will create an icon on the desktop. As you can see in following screenshot:

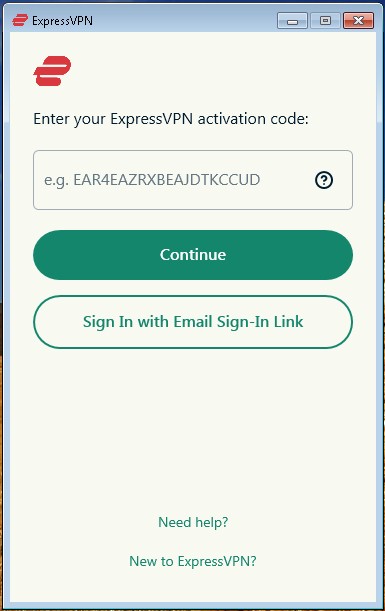
Now you are ready to start using it, double-click the icon to let ExpressVPN for Windows begin to run. Then you will be prompted with the login window, type in your credential then you can use it.
Step 3: Connect to a VPN server
Once the VPN software is installed, you will need to connect to a VPN server. Open the VPN software and select a server location. It is recommended to choose a server that is physically distant from your location, as it will make it more difficult for your internet service provider to track your online activity.
Step 4: Browse the internet
Once you are connected to a VPN server, you can start browsing the internet. Your internet traffic will be encrypted and routed through the VPN server, making it much more difficult for outside parties to track your online activity. Additionally, your browsing history will be hidden from your Wi-Fi router.
Using a VPN is a great way to hide your browsing history from your Wi-Fi router and protect your online privacy. By following these simple steps, you can start browsing the internet securely and anonymously. It’s worth noting that while a VPN can help protect your online privacy, it’s not a guarantee of privacy. It’s always a good idea to be aware of the risks and to use other security and privacy measures to protect your online activity.
Enabling HTTPS Everywhere in Your Browser: A Step-by-Step Guide
HTTPS protocol encrypts your communications with websites to prevent eavesdropping and tampering. While you are navigating on a website, all the URLs of the pages you click have been encrypted and then transferred to the server of the website if you employ the HTTPS protocol. So the Wi-Fi router you connect to would have no idea of what you are doing here. This is the second layer you can take to hide browsing history from the Wi-Fi router. Now I’m going to walk you through the process of enabling HTTPS Everywhere in your browser.
Currently, when I write this post, all papular browsers have built HTTPS everywhere as their feature. And the way to enable it is similar. In the case of Google Chrome, Microsoft Edge and Brave are all birth from the same project, I’m going to use Brave browser as an example since it is my daily driver. I’ll also show how to enable it on the Firefox browser.
Step 1: Go to setting of your browser
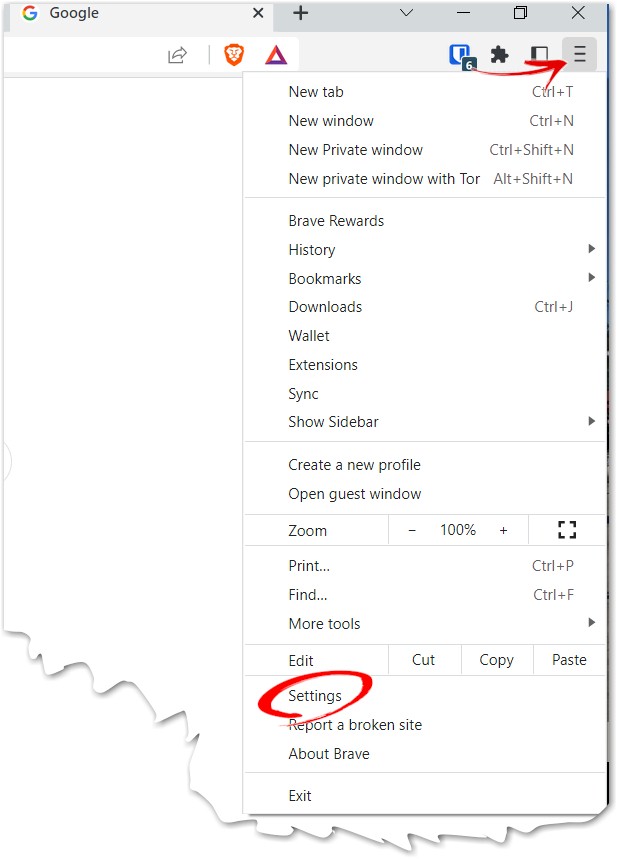
In your Brave browser, locate the three-line symbol in the top right corner. Click on it to pop up the menu of the browser. Scroll down to the very low position of the menu, you will find the command of Setting. Click on it to enter setting page. You can reference the following screenshot:
Step 2: Go to Privacy and Security section
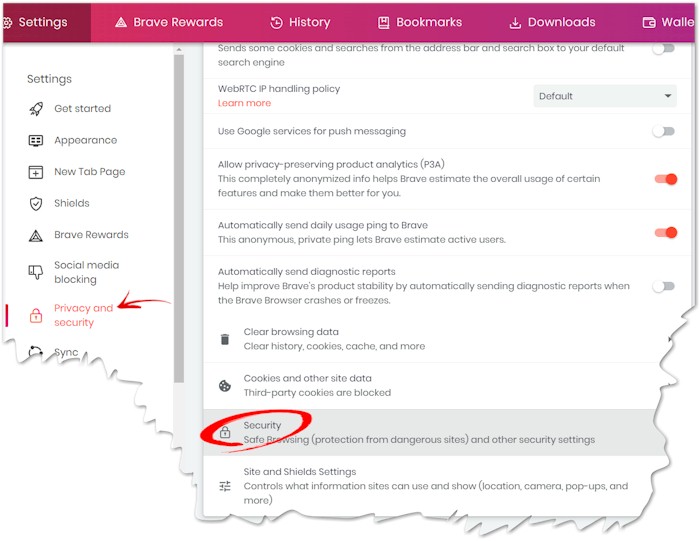
On the Setting page, find the Privacy and Security entrance on the left panel. Click on it, and now the related configuration entries will show on the right panel. Locate the Security configuration entry and click on it. As you see in the following screenshot:
Step 3: Enable HTTPS everywhere
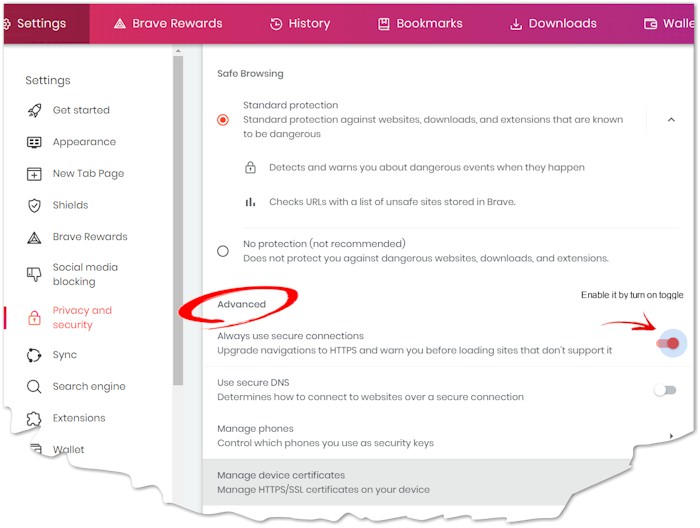
Now the right panel shows all entries of security configuration, on the low position of this page you will find the HTTPS everywhere configuration option. It’s called Always use secure connections in Brave, on the right side you can find the toggle. Click on it to turn it on. That’s it!
As with Firefox, the process is similar. You can reference the following screenshot of how to enable HTTPS everywhere in Firefox.
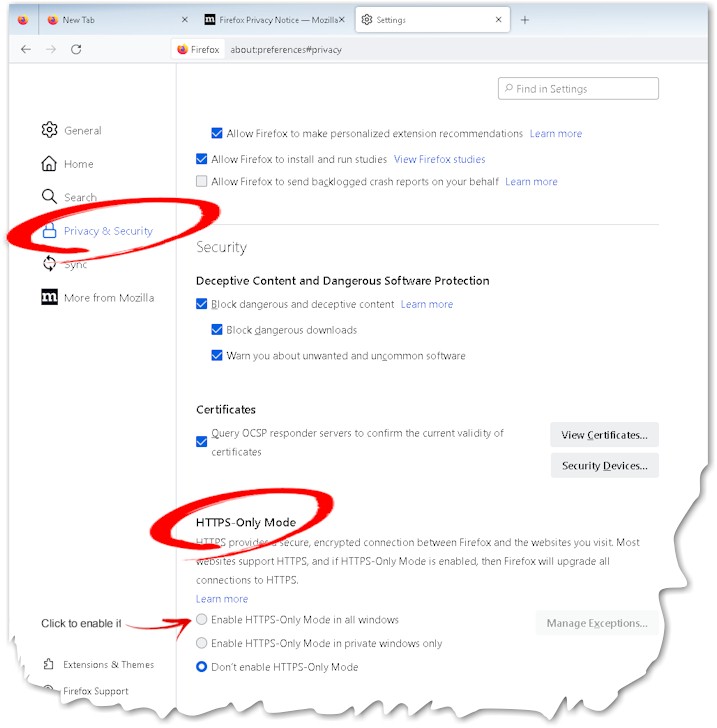
Now you successfully enable the HTTPS everywhere feature of the browser. All data about your activities on the website will be encrypted.
It’s important to mention that HTTPS Everywhere is not a standalone security solution, it is just one of the many tools that can be used to improve the security of your online activity. It is not a substitute for other security measures such as using a VPN.
Use Tor Network to hide browsing history from the router
The third measurement you can take is to access websites via the Tor network. The Tor network (short for “The Onion Router”) is a network of servers that allows users to browse the internet anonymously.
Tor routes a user’s internet traffic through multiple layers of servers, called “nodes,” before it reaches its final destination. Each node in the network only knows its location directly preceding it and the node that now follows it in the chain.
This design creates an “onion-like” structure, where each layer of the onion represents a node in the network. When a user’s traffic enters the tor network, it is encrypted and sent through the first node. The first node decrypts the outermost layer of encryption, revealing only the location of the next node.
The traffic is then sent to the next node, where the next layer of encryption is decrypted, and so on until the traffic reaches the final destination. Following is the diagram to help you easy to understand it:

Because each node in the network only knows the location of the nodes immediately before and after it, it is extremely difficult to trace a user’s internet traffic back to its source. This makes it nearly impossible for anyone to determine the identity of the person who is sending or receiving the traffic.
So the router your device connects to can’t see anything after you have reached the node of Tor, because all data have been encrypted thereafter. It only can record the IP address of the node where you got into the Tor Network. This is a little bit like the scenario of using a VPN.
Here is the step-by-step guide on how to do it:
- Go to the download page on the official website of Tor(https://www.torproject.org/download/), and pick the correct version that fits your device.
- Click on it to begin downloading it.
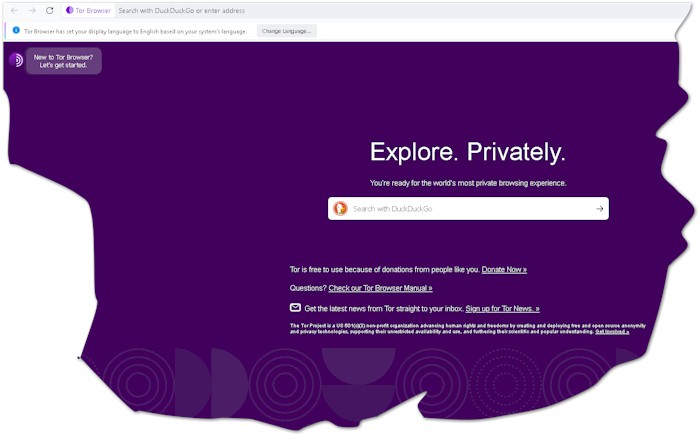
- Once the installation is complete, double-click it to run the Tor Browser.
The Tor Browser will connect to the Tor network with a few clicks. Once connected, you will see a message that says, “Explore. Privately. You’re ready for the world’s most private browsing experience.”
Now you would use the Tor Browser to browse the internet as usual with the regular browser. Your internet traffic will be routed through the Tor network, making it difficult for anyone to trace your browsing history, causing a privacy breach.
Uncovering the Secrets: How Your Router is Recording Your Browsing History
It is not surprising to know that almost all administrators of WiFi routers have enough motivation to monitor users’ browsing history. Because they are administrating the network and responsible for the user’s actions, they’d like to log which websites are visited to ensure nobody is doing illegal stuff. If something happens, they’d like to have evidence of who did what, when, etc.
As a user who wants to keep privacy, it’s best to acknowledge the common ways that the administrators take to log the user’s browsing history on a WiFi router. Just like some cybersecurity guy says, if you want to protect something, you have to know about it. So you can take steps to protect your privacy. Here are five common ways that your WiFi router is tracking your browsing history:
- Router Logs: Many routers can log all the traffic that passes through them, including web browsing history. The administrator can access this information by logging into the router’s administration page using a web browser. The built-in log feature can be a powerful tool for monitoring a user’s web activity. Still, it is essential to note that the log files are usually stored on the router’s internal memory and can be cleared or deleted. But administrators can always find a way to save log files in a router’s memory to a file regularly, such as using a script to download the log files automatically.
- Network Monitoring Software: Network monitoring software can be installed on the router or a separate device connected to the network. This type of software can track all traffic that flows through the network, including web browsing history. This information can be accessed by logging into the monitoring software’s interface. Some examples of network monitoring software are Wireshark, PRTG Network Monitor, SolarWinds Network Performance Monitor, etc.
- Parental Control Features: Many routers come with built-in parental control features that allow you to monitor and restrict the websites that can be accessed by devices connected to the network. This information can be accessed by logging into the router’s administration page using a web browser.
- Third-party firmware: Some routers allow users to install third-party firmware, such as DD-WRT, which enables advanced features like monitoring browsing history.
- DNS Queries: DNS (Domain Name System) queries can be used to monitor users’ browsing history on a router by tracking the websites that are being accessed by devices connected to the network. When a device connects to a website, it sends a DNS query to the router to resolve the website’s domain name to its corresponding IP address. This information can be used to determine which websites are being accessed by the device.
Now you have known the common ways that administrators take to log the user’s browsing history on the router. Though some of these methods may require advanced technical knowledge and not all routers have these capabilities.
Why Incognito mode doesn’t help you hide browsing history from the router
Incognito mode, also known as private browsing mode, is a feature in web browsers that allows users to browse the internet without leaving traces of their activity on the computer. However, it is essential to note that while incognito mode prevents the browser from storing information such as cookies, browsing history, and search history on the computer, it does not completely delete this information. It also does not help you hide browsing history from the router.
When you access the internet, your computer sends requests for web pages and other data to the router, which then sends those requests to the internet. The router logs all of this traffic, including the URLs of the websites you visit, the time you access them and the amount of data transferred. This information is stored in the router’s memory, and its administrator can access it.
You already have learned from this post above that all ways used to monitor your browsing history have no business with locally stored data. Instead, it is all about communication data between your device and router while you are surfing online.
Incognito mode only prevents the browser from storing information on the computer, and it does not prevent the router from logging this information. So, even if you use incognito mode, the router can still see the websites you visit and the time you visit them.